04 / Field guide
WIN THE ROOM.
CHANGE THE MAP.
The match ends when one side has no built command base left. A new weapon is useful. The infrastructure that makes it available is a target.
- 01
Join a side
Walk through a ready-room doorway for Qind Qompany, Cyber Creep, the smaller team, or spectating.
- 02
Establish the front
Follow field orders. Connect resource sockets and defend the structures that turn territory into supply.
- 03
Expand & research
Claim command sites, unlock tiers, and spend team and personal supply on the next advantage.
- 04
Break their network
Attack collectors, links, labs and bases. Keep your last built Outpost or Anchor standing.
On the ground
Your squad is the plan in motion.
Move with the team, cover the person building or welding, and read the commander’s waypoint. Return to a powered Outpost or Requisition to buy crew equipment; the hive uses an Anchor or Brood cache for fabrication. Patches holds G to stow his gun and work with the dedicated Arc shears welder. Releasing G draws the selected firearm again.
The crew are critically incapacitated at zero health. Linked medical teleportation retrieves and stabilizes them before a return pad redeploys ready personnel. Equipment is lost on incapacitation. The Creep mend near an Anchor, on their web after combat, or beside a Spool; their bodies are assembled again in waves.
In command
Your team is more than the fight you can see.
Face a nearby built command station and press E to take the chair. Select a field player to issue a targeted order, or issue a team destination with no selection. Place structures, manage research and keep the network connected.
Crew commanders can teleport in health and ammunition packs, spending the same team supply needed for expansion. Hive commanders invest in Seedweb growth, fabrication, Needles and trait chambers. Press E to return to the field.
First match essentials
Learn these. Open F1 for the rest.
- WASD Mouse
- Move and aim
- Shift Space
- Sprint and jump / lift
- LMB R
- Fire and reload
- RMB
- Specialist / chassis ability
- E
- Use, service, build, or enter / leave command
- B
- Buy equipment or choose a chassis at a station
- G
- Hold: Patches’s Arc shears / secondary ability
- F1
- Open the full help and controls
- F
- Flashlight / Creep sense
- C Tab
- Hold sector map / roster
- Y Enter
- Push-to-talk / team text
- F4
- Return to the ready room from the field
Light, power and detection
The crew’s flashlights reveal useful ground and give their positions away. A damaged power junction drops a location to emergency lighting and stops crew stations and labs there. Hold E to restore it, then weld it. Creep sense reads structure, power and visible electrical signatures; separate hive sight reveals tagged or network-sensed crew through walls.
Water and body size
Deep water changes movement and visibility. CyberPengu, Ducké and Axi handle swimming well; other crew are slowed, and Hex scrambles out. Aim down while moving forward to dive. Bastion cannot use the small chassis’ vents or service crawls; a flank route can be an advantage even when it is too small for a heavy assault.
Supply, repair and reinforcement
Collectors and Siphons feed separate team and personal banks. Team supply pays for construction, research and crew support drops; personal supply pays for weapons, gear, chassis and hive traits. Crew medpacks restore health and welding restores armor. Stations provide ammunition, not free health. Protect the supply chain before asking it to support a push.
05 / Technology & infrastructure
BUILD A FRONT.
UNLOCK THE FUTURE.
Research proceeds in order: tier 1, then 2, then 3. Each needs a working station, time and team supply. On Tideglass, advanced technology also needs built bases. Losing a base can switch an already researched tier offline.
FOUNDATIONOutpost + power network
Collectors earn supply. Build a powered Research station to advance equipment tiers; add an Arms lab for Weapons and Armour upgrades.
Tier 0: Rivet · Ram · Latch · Axe
TIER 01Specialize1 built Outpost
30 team supply · 40 s research
- Purge projector
- Pulse grenade and mines
- Weapons 1 / Armour 1 at an Arms lab
Weapons or Armour 1: 20 team supply · 75 s each.
TIER 02Change the approach1 built Outpost
50 team supply · 70 s research
- Arc shears
- Bellows pack
- GL and frag grenades
- Weapons 2 / Armour 2
Weapons or Armour 2: 30 team supply · 90 s each.
TIER 03Commit the heavy kit2 built Outposts
70 team supply · 100 s research
- Porter frame with rotary or rail arms
- HMG
- Weapons 3 / Armour 3
Weapons or Armour 3: 40 team supply · 120 s each.
An Arms lab runs one upgrade job at a time. A second lab lets the two lines run together. Each Weapons level adds 10% gun / melee damage; explosives and shears receive no damage bonus. Each Armour level adds 10 maximum armor. Destroy every working Arms lab and those researched bonuses go offline until a working lab returns.
FOUNDATIONAnchor + connected Seedweb
Siphons earn supply. Looms extend territory. A powered Foundry Spire advances hive tiers; trait chambers turn the web into a specialized fighting network.
Tier 0: Scuttle · Spool · mending · construction
TIER 01Watch & harass1 built Anchor
30 team supply · 40 s research
- Chime chassis and airborne spikes
- Scuttle parasite
- Spool salvage and clogs
- Needle Array
- First Kiln, Spur or Veil
TIER 02Expand the network2 built Anchors
50 team supply · 70 s research
- Skip chassis and sideways dodge
- Scuttle leap
- Chime Dispersal
- Spool Injector, webs and bile pods
- Second chamber of each kind
TIER 03Bring the heavy body3 built Anchors
70 team supply · 100 s research
- Bastion chassis, charge and slam
- Skip Metabolize
- Third chamber of each kind
Kiln grants Carapace, Spur grants Celerity, and Veil grants Aura. A player buys each trait for 8 personal supply at a fabrication point and keeps it through chassis changes and new lives. Its strength follows the number of working chambers, capped by the active hive tier.
Structure field manual
What every structure does.
Construction uses team supply. Costs below are the current Tideglass rules and may change during development.
Qind Qompany 07 structures
QC / 01Outpost65 supply
A command base, power root, reinforcement point and ammunition station. Build it on a free command-site socket; it takes 45 seconds while powered. The team must keep at least one completed Outpost standing to remain in the match.
Tier 3 needs two built Outposts.
QC / 02Collector10 supply
Claims an authored resource socket and generates team supply plus personal supply for every crew member while built and powered. Income stops if the Collector is destroyed or its power connection is cut.
QC / 03Relay5 supply
Extends the Outpost’s power network to further stations and resource sockets. A chain needs a live connection to an Outpost; isolated relays do not power each other indefinitely.
QC / 04Requisition20 supply
A forward equipment and ammunition station. Crew use a nearby working station to buy weapons and gear. It needs a power connection and a lit location; health recovery comes from medpacks, not the station.
QC / 05Research20 supply
Runs the three equipment-tier research jobs. It must be completed and powered, and the next tier’s base requirement must be met before research can begin. Each job spends team supply and takes time.
QC / 06Return gate20 supply
A low medical return pad that redeploys recovered personnel closer to the front. It needs power and a clear landing area. The team can route reinforcement through the forward pad; a base under siege can recall reinforcements home.
QC / 07Arms lab10 supply
Researches Weapons or Armour upgrades, one job per lab. A second lab can run the other line. The lab must be built, powered and in a lit location. With no working lab, the researched bonuses are retained but inactive.
Cyber Creep 10 structures
SW / 01Seed Anchor65 supply
The hive’s command base, Seedweb root, fabrication point, mending aura and reinforcement source. It occupies a free command site and takes 45 seconds to build. One, two and three built Anchors support hive tiers 1, 2 and 3.
Keep at least one completed Anchor standing.
SW / 02Salvage Siphon10 supply
Harvests a resource socket for the hive’s team and personal supply. A Siphon must be built and connected to the hive. Powered Siphons also raise the allowed number of Needle Arrays, to a maximum of three.
SW / 03Sentinel Loom5 supply
Extends connected Seedweb into new territory. A completed, connected Loom grows its patch along open routes, reaching through doorways rather than through walls. Destroying or disconnecting it can silence the machinery beyond it.
SW / 04Brood cache20 supply
A forward fabrication point where Creep spend personal supply to change chassis or buy available traits. It works while completed and connected; a protected cache keeps reassembly closer to the front.
SW / 05Foundry Spire20 supply
The hive’s research station. Runs tier research while completed and powered. Each successive tier needs the corresponding number of built Anchors, so a Spire cannot replace expansion.
SW / 06Transit Burrow20 supply
A connected reinforcement structure. The current rules prioritize built Anchors for hive reinforcement; a powered Burrow is a fallback return point when that selection has no suitable Anchor.
SW / 07Needle Array24 supply
A tier-1 emplacement that locks a visible crew member’s floor position, warns, charges and pulses into that circle. It forces movement and calls nearby hive bodies toward the marked target. Cover or leaving the circle avoids the pulse; cut its Loom, short it with shears, or interrupt its charge with the Ram.
Needs connected Seedweb, spacing from bases and resource sockets, and an available Siphon-supported capacity.
SW / 08Kiln15 supply
Raises the Carapace line: each working Kiln adds one level, capped by the hive’s active tier. Creep who bought Carapace gain extra armor equal to 5% of their chassis’s full health-and-armor pool per level.
SW / 09Spur15 supply
Raises the Celerity line. A purchased Celerity trait adds 4% movement pace per working level. A second or third Spur needs hive tier 2 or 3, respectively.
SW / 10Veil15 supply
Raises the Aura line. A body with the purchased trait contributes a hive-sight aura of four meters per working level, revealing crew in its range through walls to the network.
The habitat supplies the places to fight over.
Command sites are the authored sockets for an Outpost or Anchor. Only a base can occupy one; an unfinished base does not satisfy the survival or tier requirement.
Resource sockets take one Collector or Siphon. Both team and personal income depend on keeping those collectors built, alive and connected.
Power junctions govern a location’s lighting and crew station / lab operation. They are repairable habitat infrastructure, not a commander purchase.
PERSONNEL & FABRICATION FILES
The people.
The machinery.
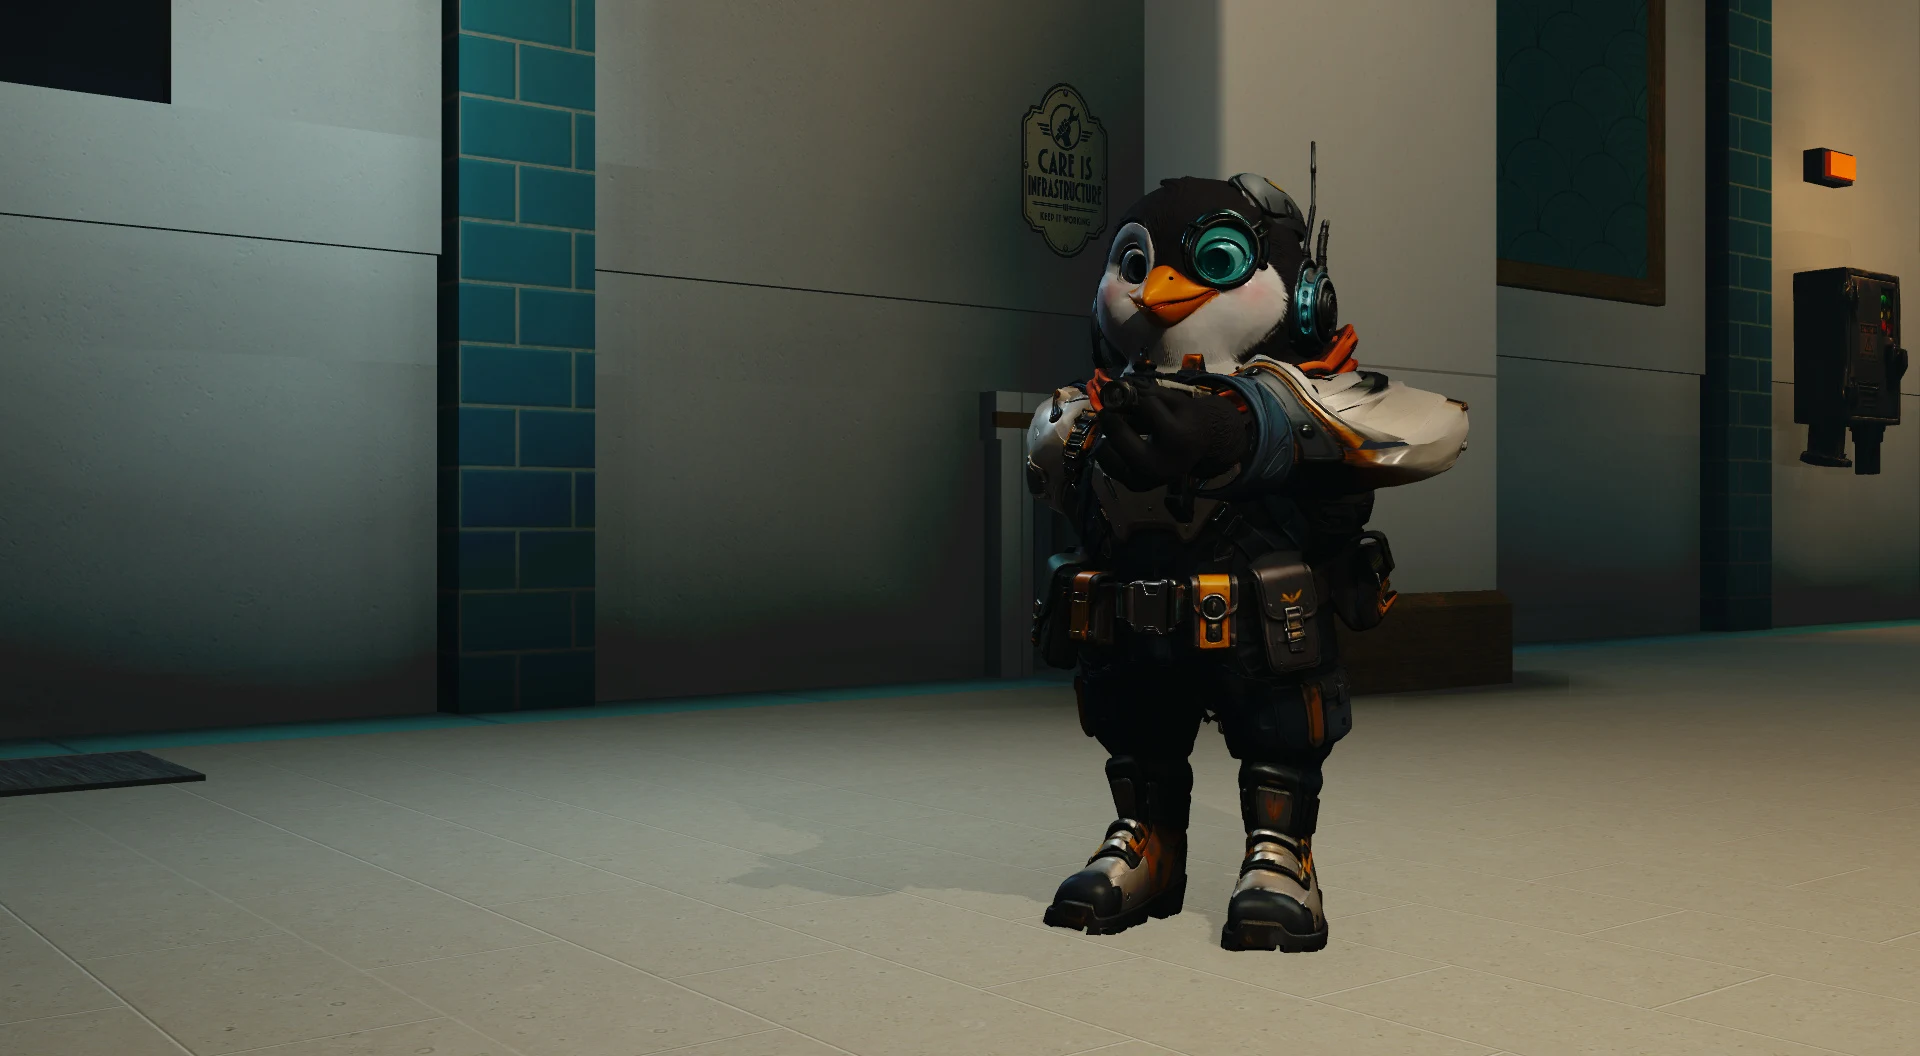
Penguin / Rescue
CyberPengu
Get low. Get through.
Get your people home.
- Belly slide
- Dive into a fast, low slide that trips Creep in your path. Fire again at the end of the slide.
- Headcount
- Your slide recharges faster when a nearby ally is critically short of health.
- In the field
- A capable swimmer and a mobile answer to a threatened teammate.
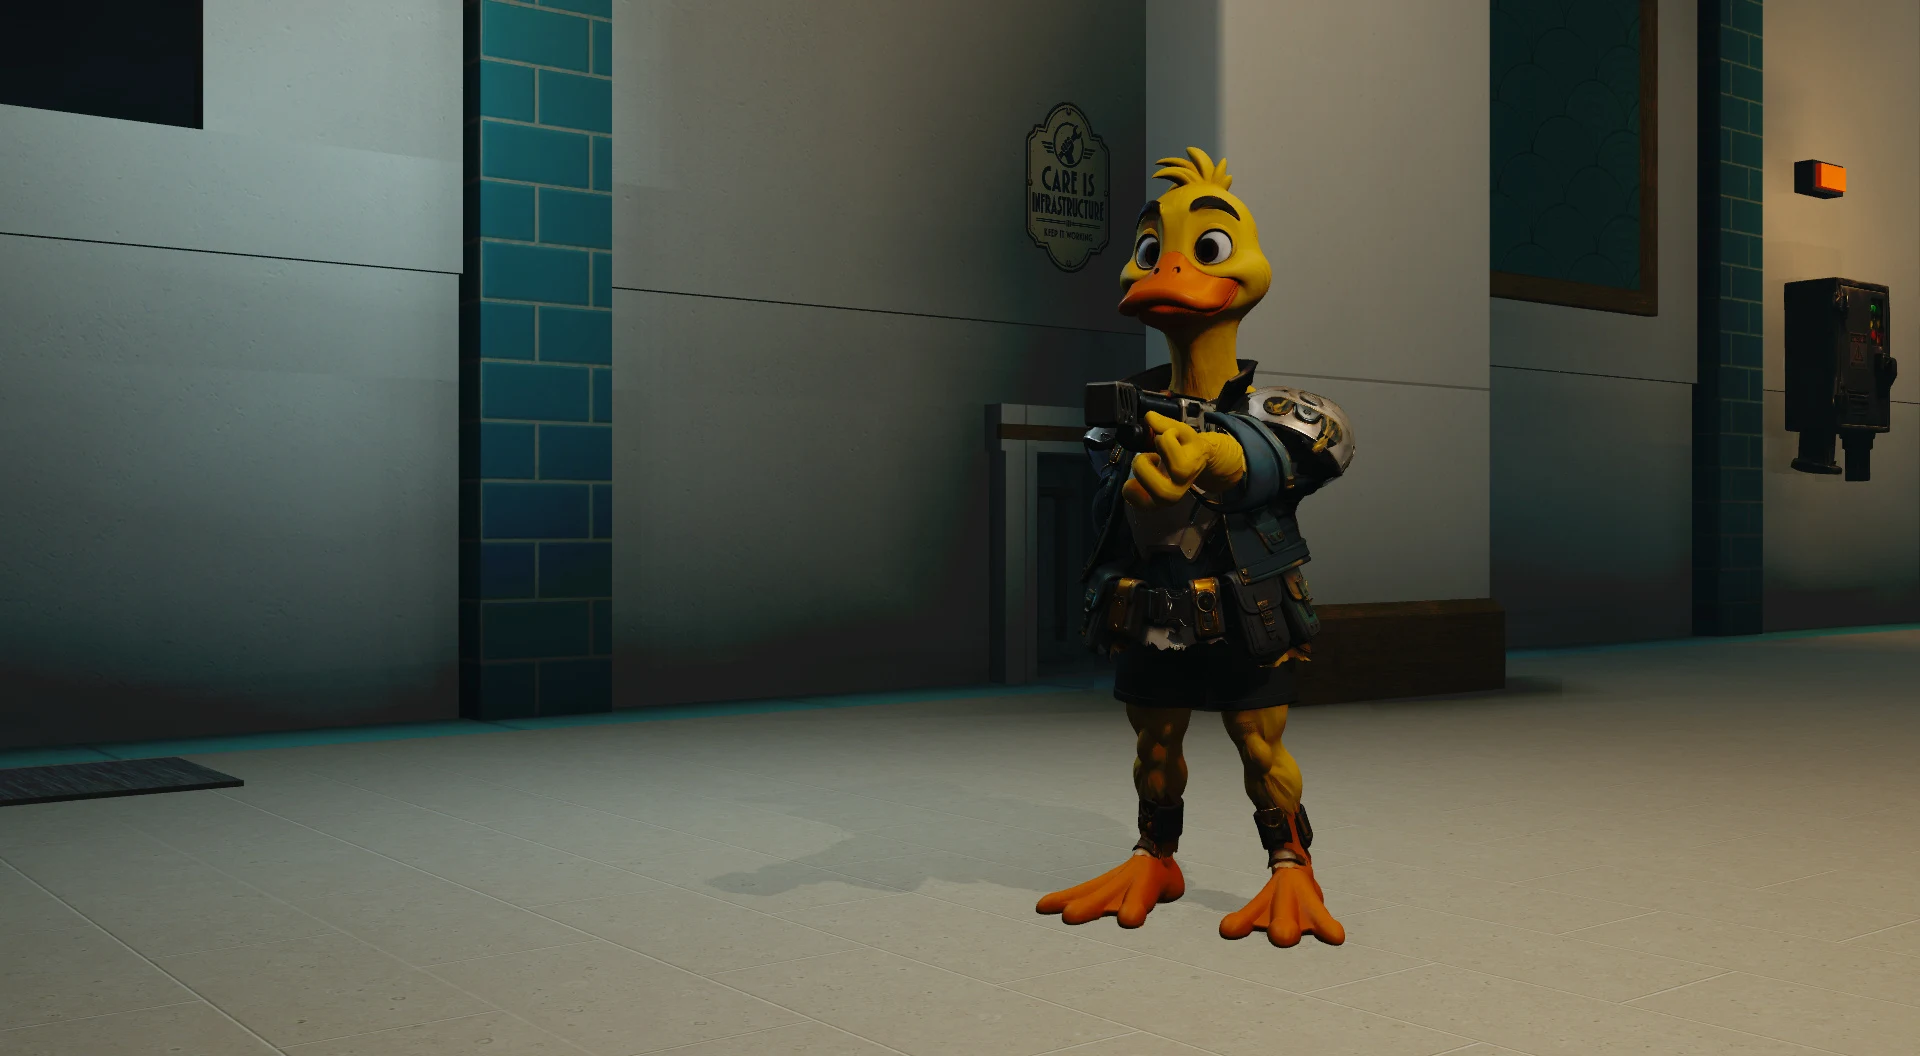
Duck / Warning & lure
Ducké
Hear trouble coming.
Give it somewhere else to go.
- Decoy
- Throw a squawking box that draws Creep attention and paints what it sees.
- Dock announcer
- Hear fast-moving Creep through nearby walls when they are off their Seedweb.
- Contact call
- Share what you hear with the squad. Flutter after walking off a ledge; handle water and the Bellows pack well.
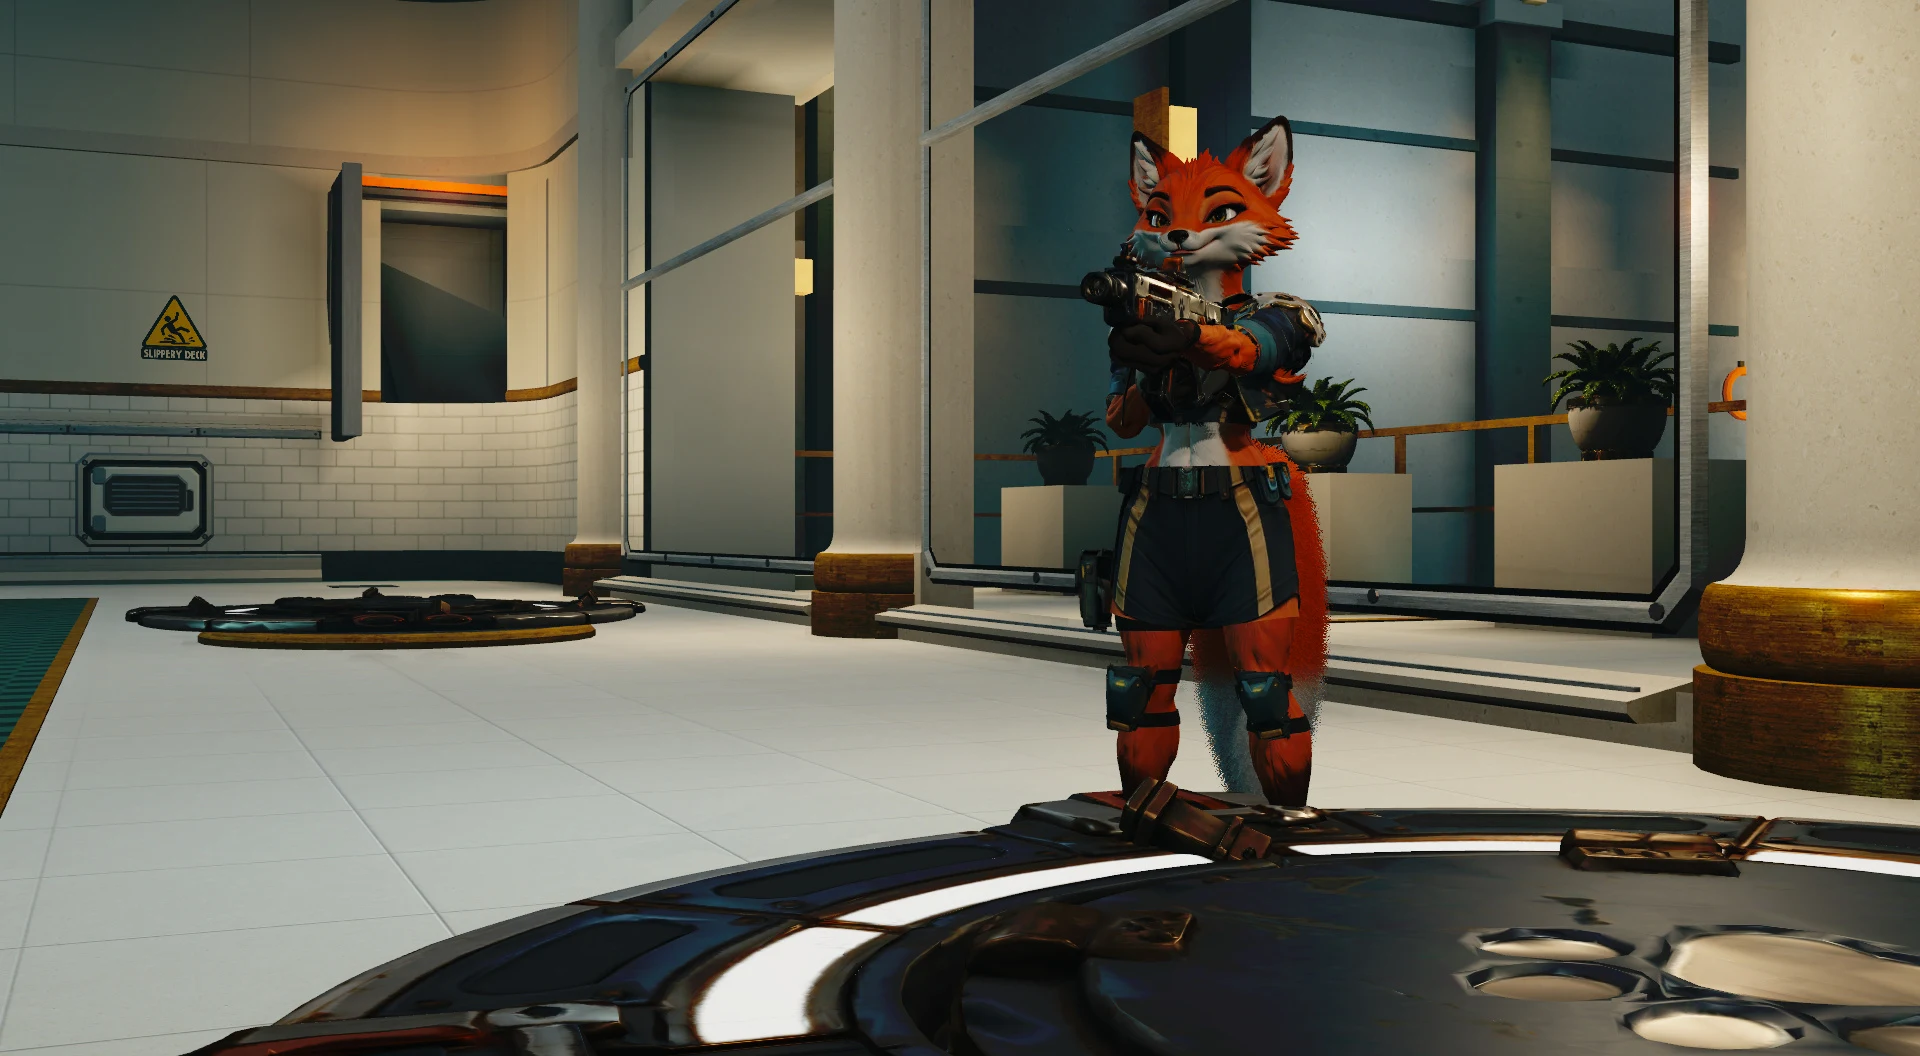
Fox / Tempo
Vix
Find the opening.
Make those seconds count.
- Overclock
- Trade some health for a short burst of faster gunfire or faster shears work.
- Stride
- Move faster after a brief period without firing or taking a hit.
- In the field
- Quick rotations and strong Bellows handling reward a carefully timed push.
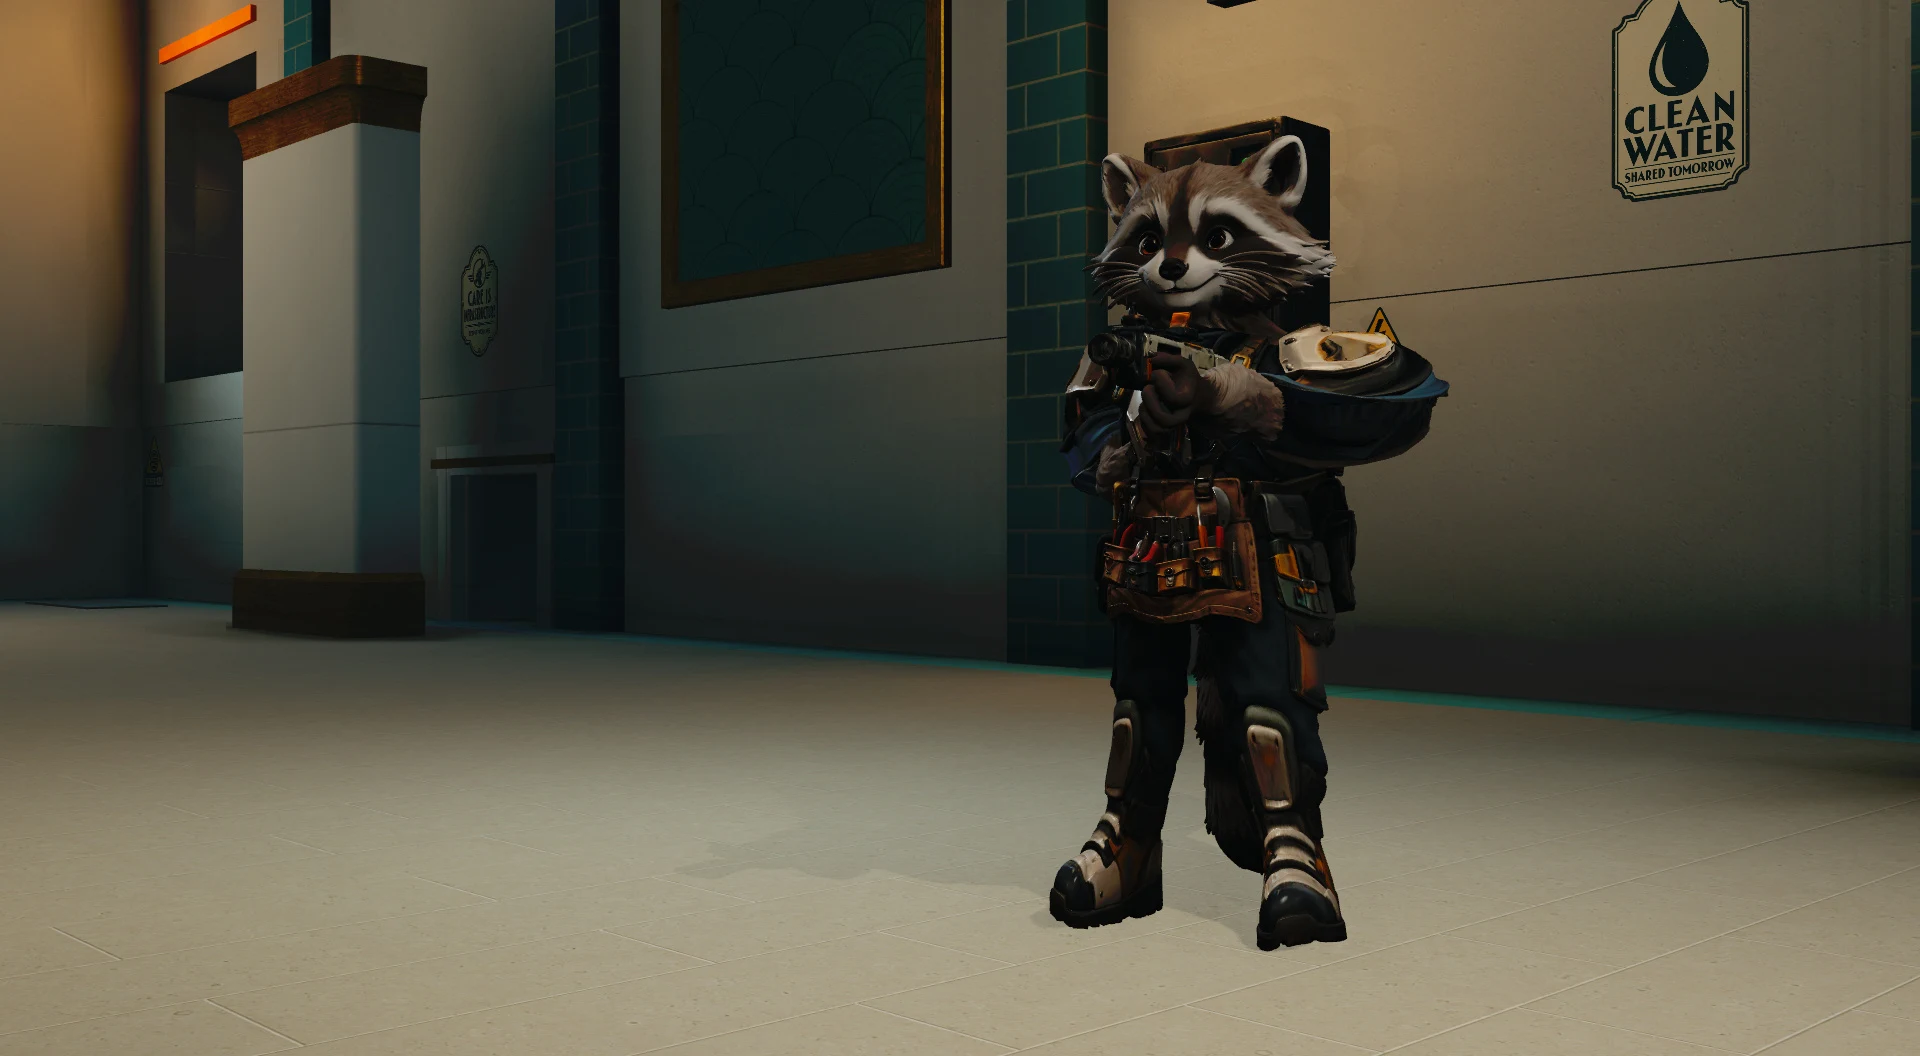
Raccoon / Supply
Cache
Of course there’s a spare.
There is always a spare.
- Supply dump
- Kneel to leave a supply crate: a station on the power grid, a spare magazine away from it.
- Packed a spare
- Carry a universal magazine and toss it to a teammate who needs it.
- In the field
- Faster reloads keep the squad’s supply specialist useful while the corridor is still contested.
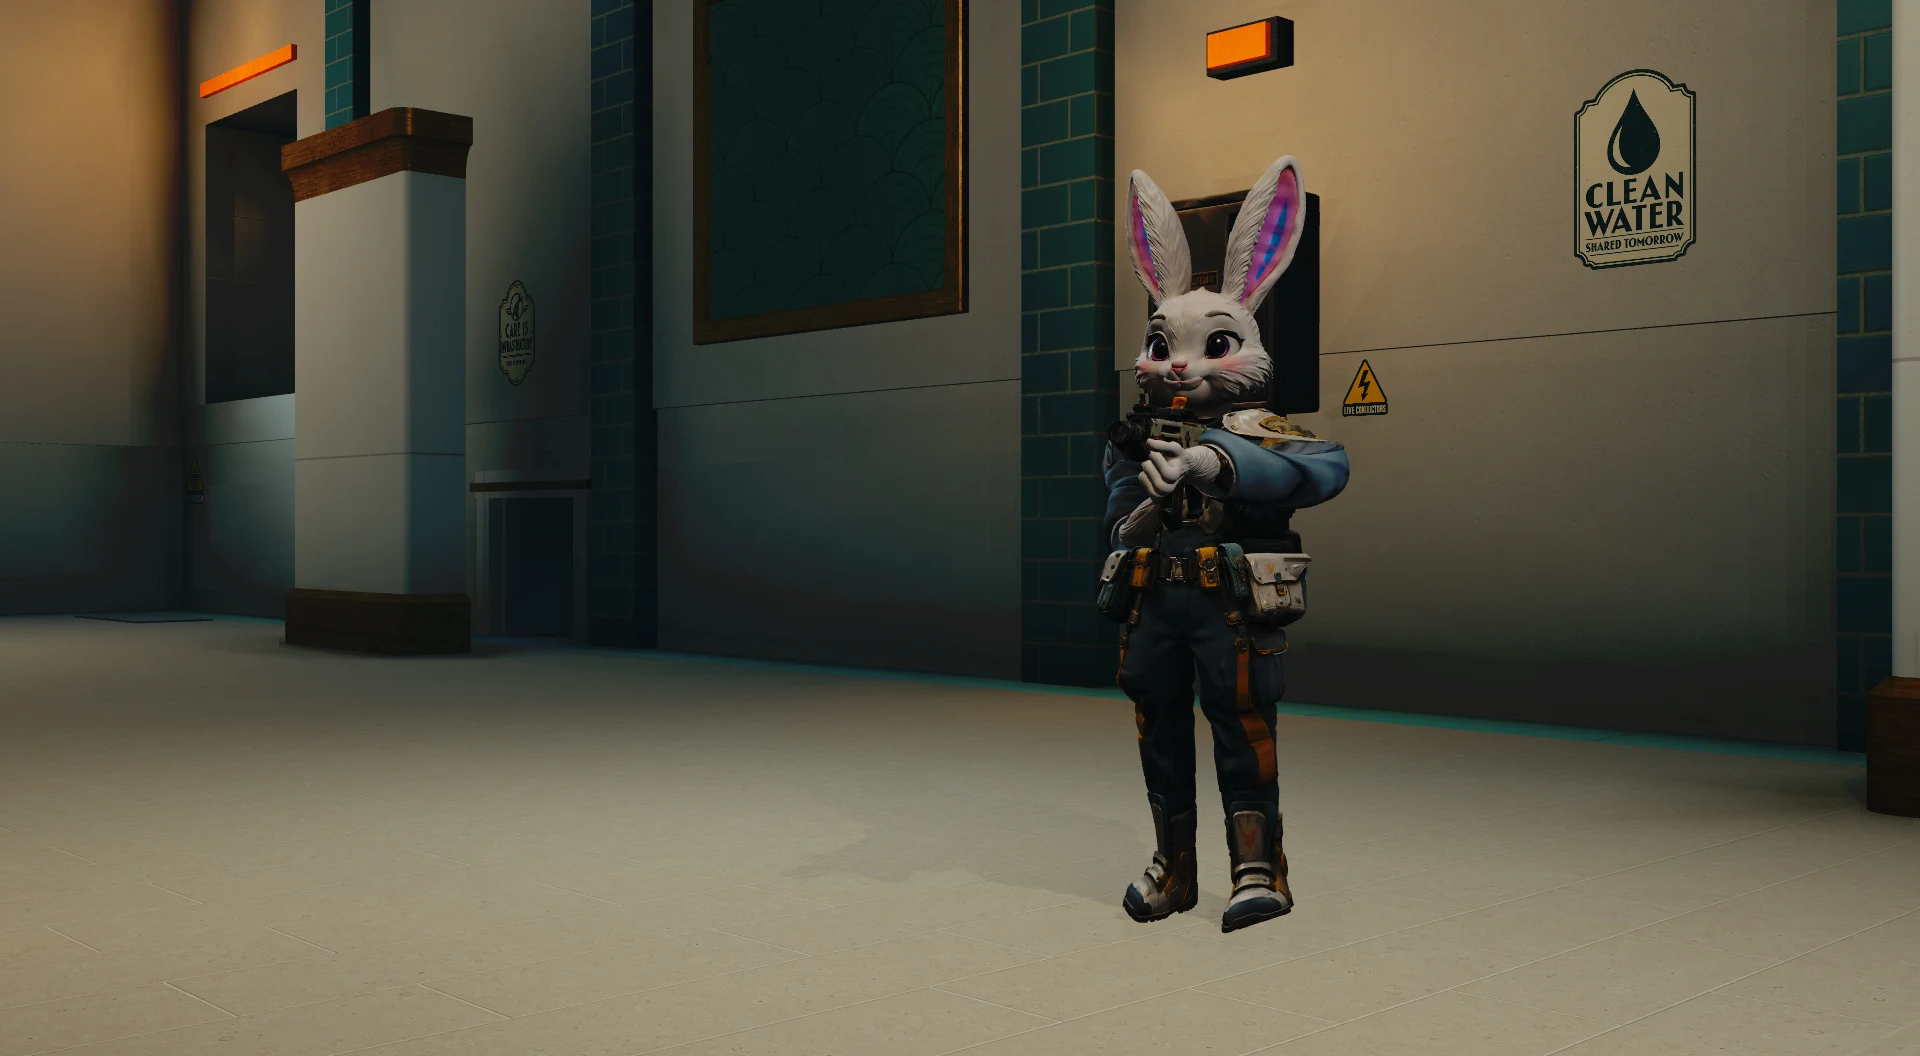
Rabbit / Protection
Mochi
The squad stays together.
That includes staying alive.
- Cushion field
- Give nearby teammates a shared pool of protection against bites. The field protects them, not Mochi.
- Triage
- Medpacks collected near Mochi provide stronger healing.
- In the field
- Carry a medpack for the person who needs it. Stay close enough to make the protection matter.
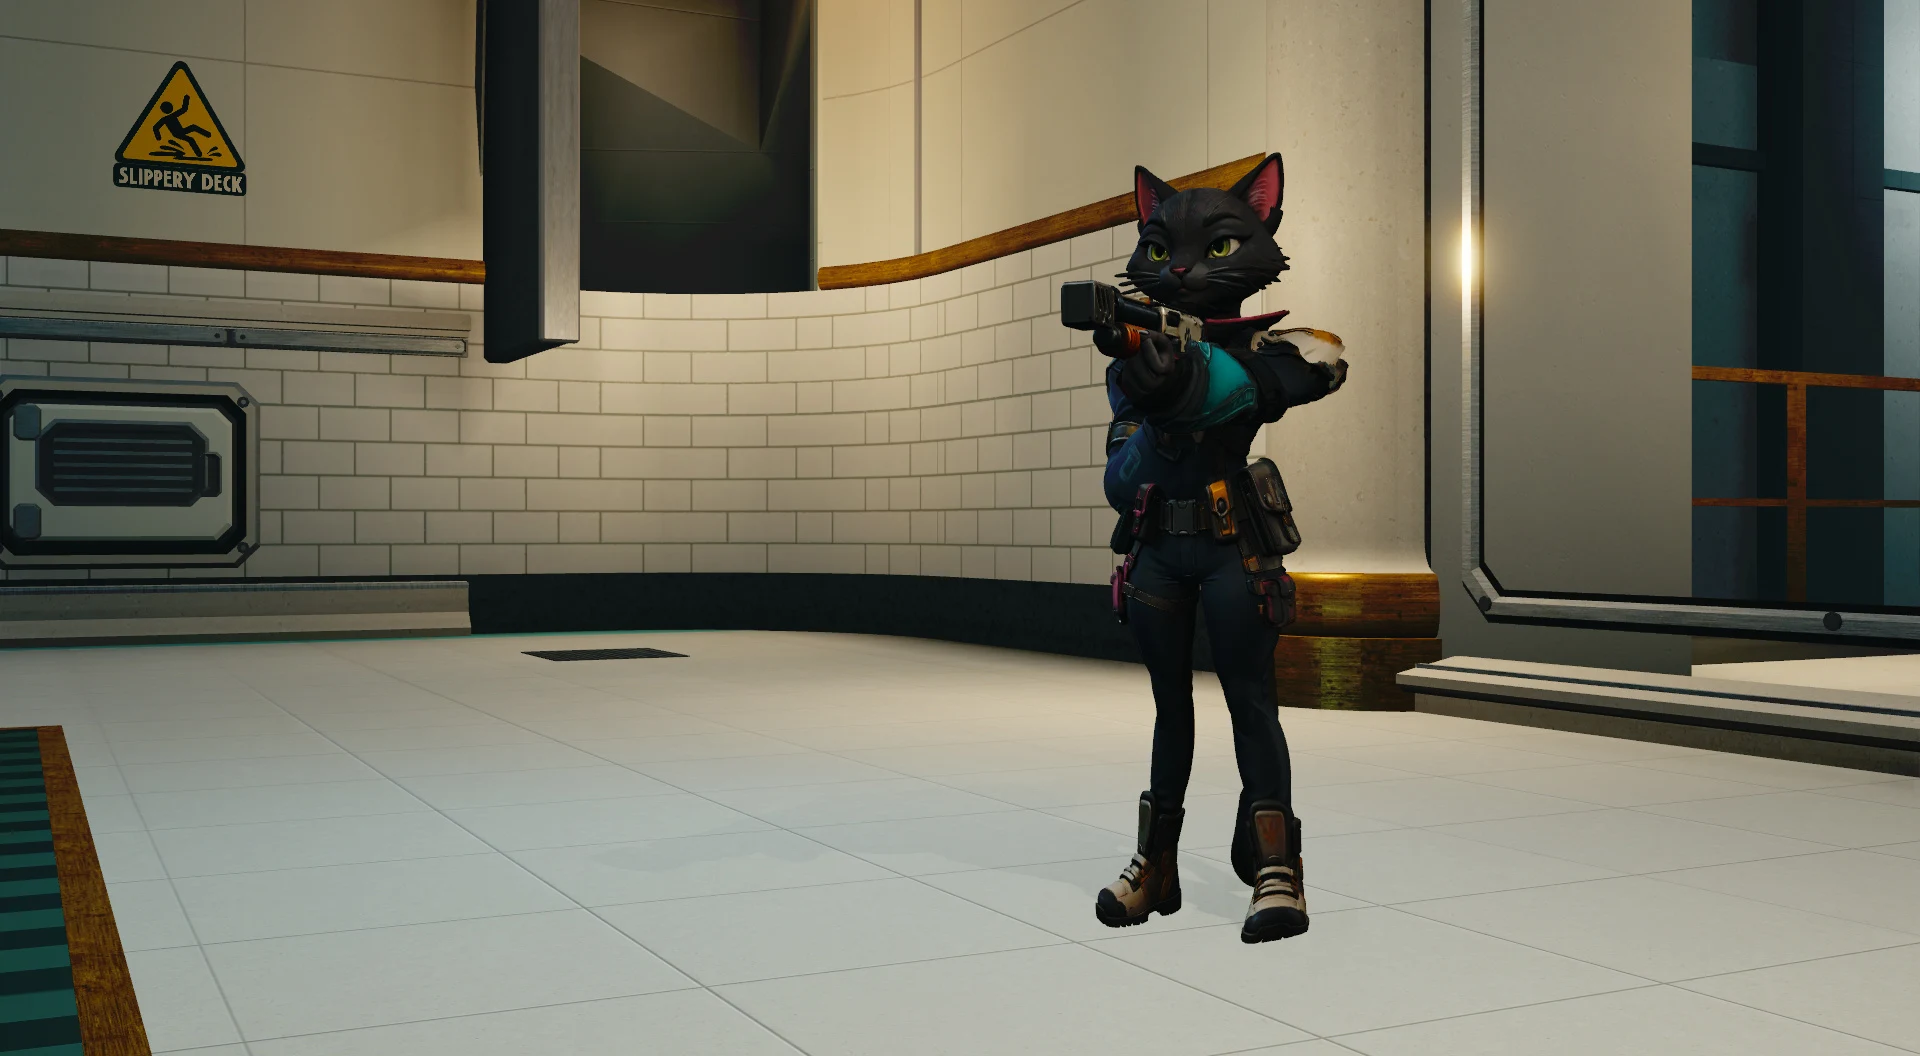
Cat / Flanking
Hex
They are watching the door.
You know another way.
- Ghost protocol
- Briefly evade Needle targeting and distant Creep detection; the first shot springs a stronger ambush.
- Blind side
- Deal extra damage to a Creep that is facing away.
- In the field
- A small, fast body with a higher jump and a short wall scramble. Hex will not swim.
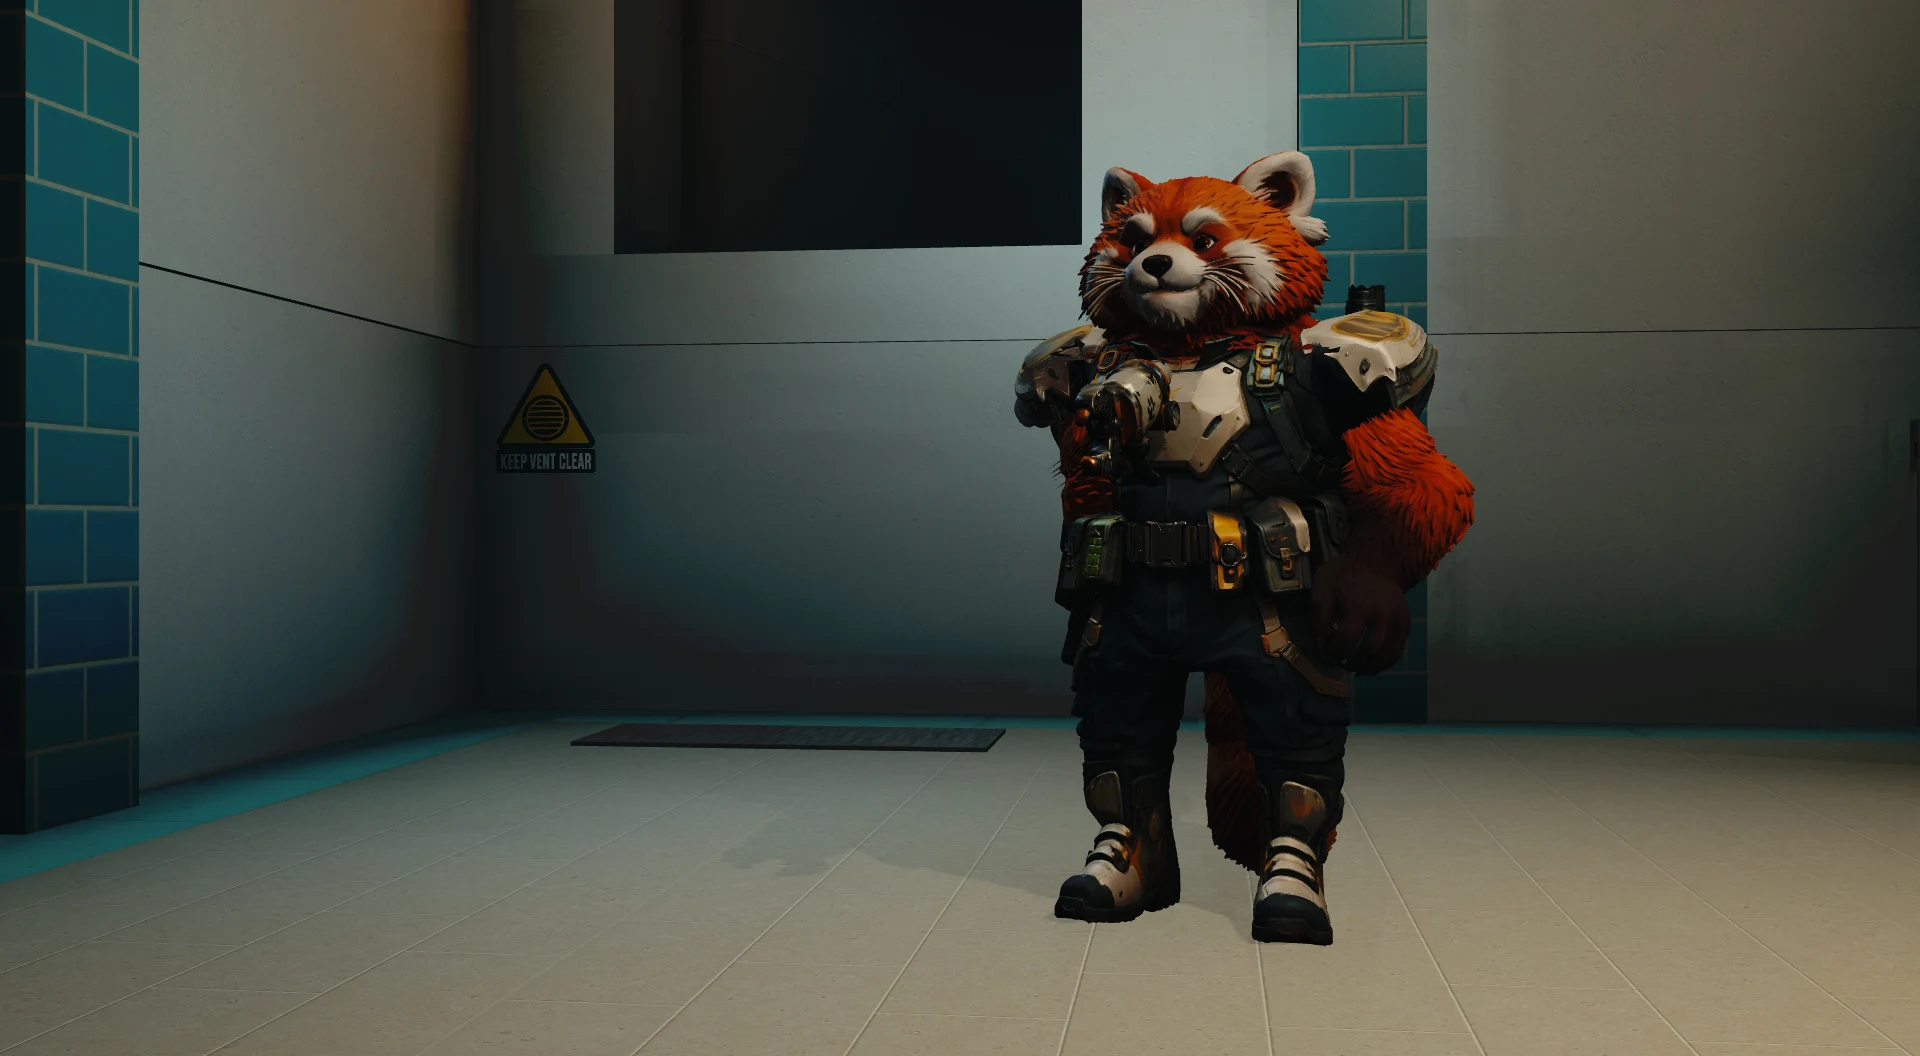
Red panda / Repair
Patches
Keep the torch working.
Keep the front standing.
- Field weld
- Lower the weapon for faster nearby welding and reduced incoming damage while the torch works.
- Rigger’s torch
- Use a dedicated Arc shears welder to repair structures and restore some teammate armor. Hold G to stow the gun and work with the welder. Release G to draw the selected firearm again.
- In the field
- The largest crew member carries a tougher pool and extra magazines. His Bellows pack provides ground thrust rather than lift.
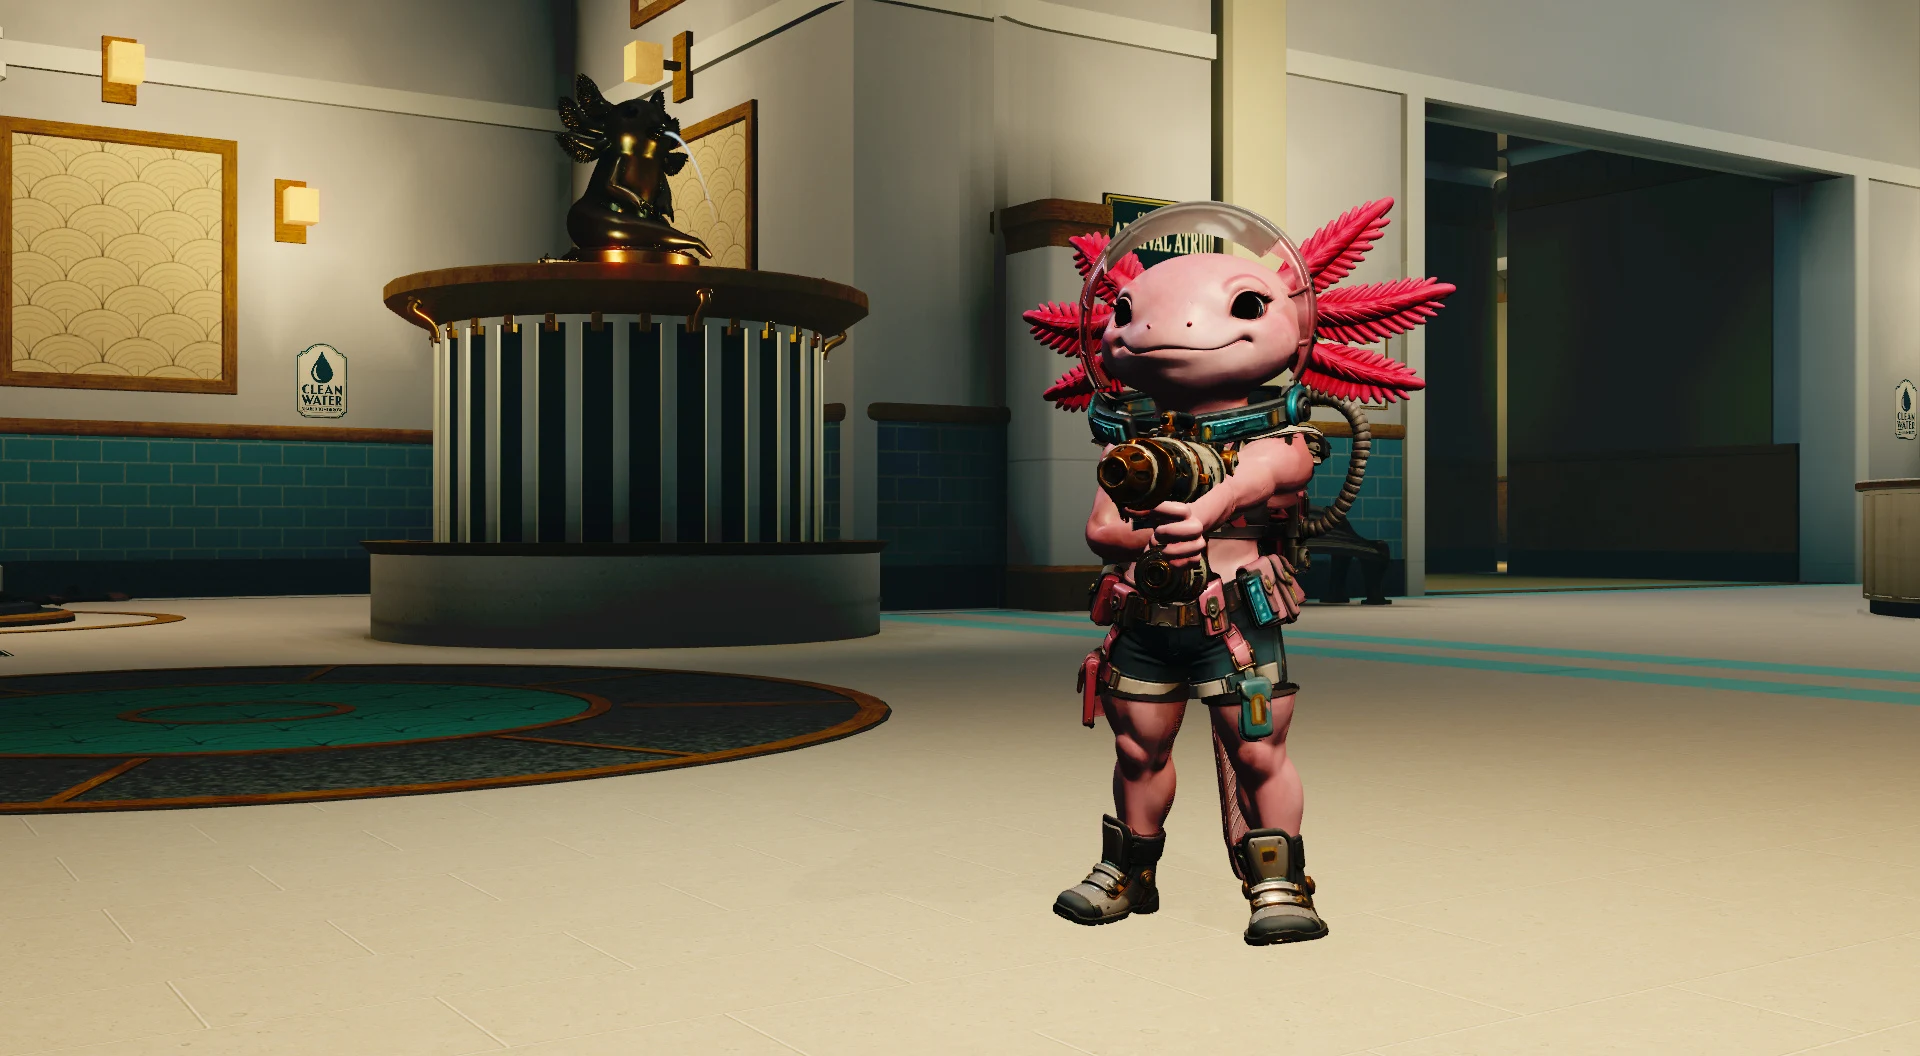
Axolotl / Denial
Axi
Find the weakness.
Interrupt the recovery.
- Quarantine charge
- Stick a timed charge that briefly stops nearby hive machinery and mending.
- Diagnosis
- Mark wounded Creep and recently mending Spools for the squad.
- In the field
- Gills and strong swimming make flooded routes useful approaches to the hive’s support network.
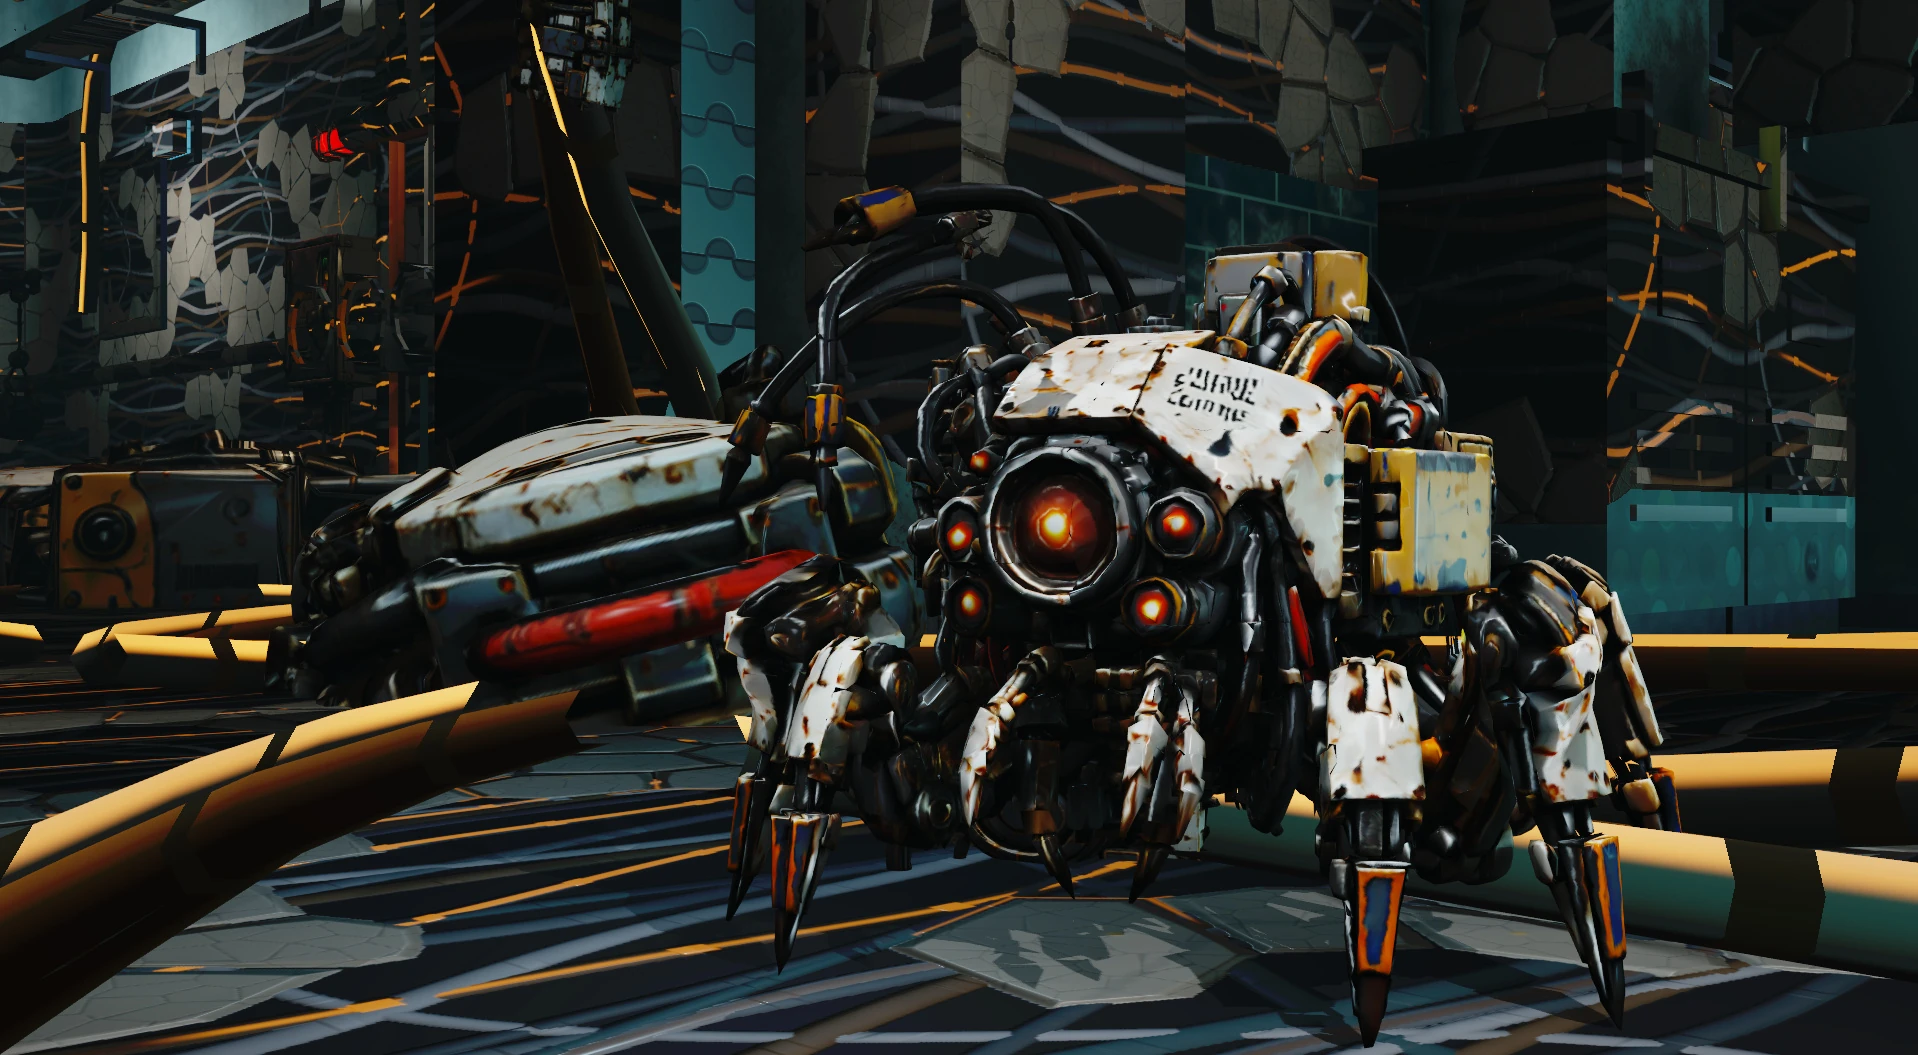
Starter chassis / 0 personal supply
Scuttle
The ceiling is a route.
The dark is an approach.
- Role
- A small, fast biting body that can cling to walls and ceilings.
- Tier 1 / Parasite
- Tag a crew member for hive sight through walls. A medpack or a teammate’s weld can clear the parasite.
- Tier 2 / Leap
- Launch into a close-range attack. Approach from an angle the rifles are not covering.
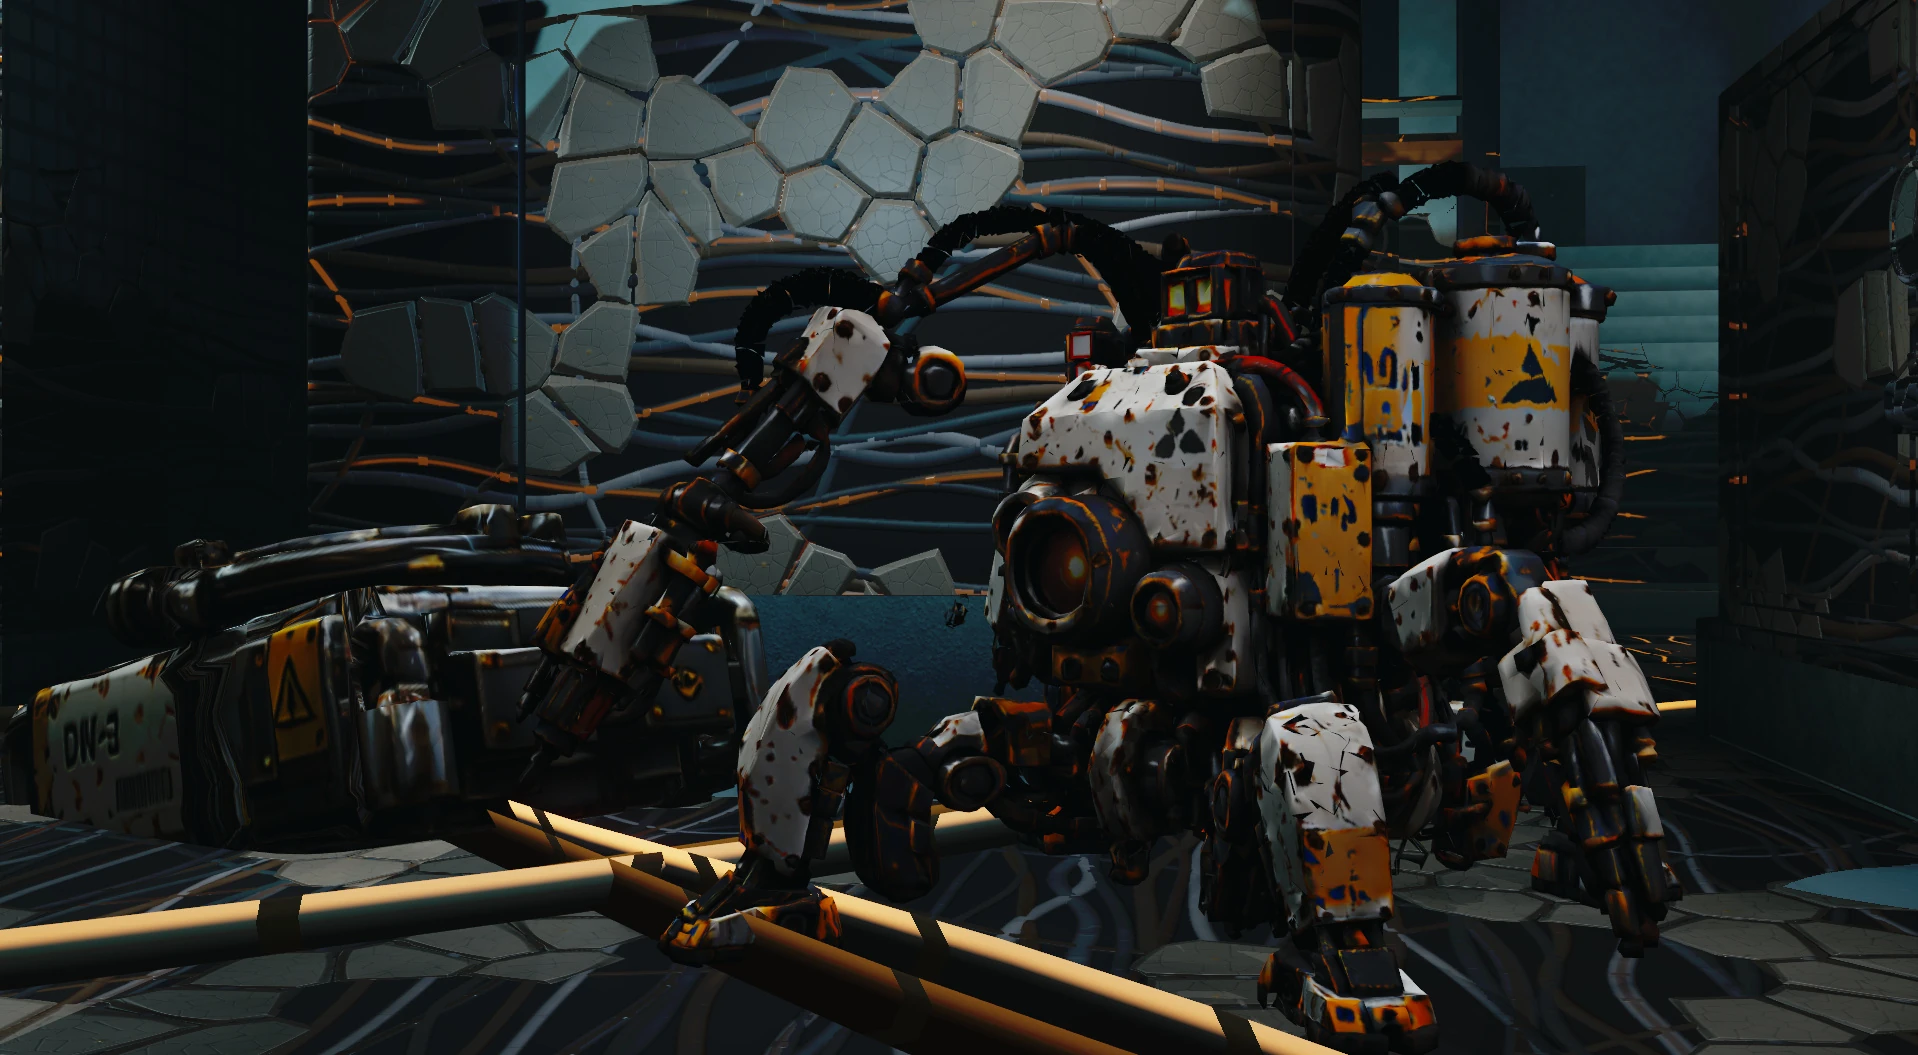
Support chassis / 12 personal supply / tier 0
Spool
Repair the body.
Grow the next position.
- Role
- Mend nearby Creep and repair hive machinery. Accelerate construction by working near it.
- Tier 1 / Salvage & clogs
- Strip crew deployables and fabricate junk blocks for cover without sealing a crew route.
- Tier 2 / Injector & traps
- Heal a visible ally at range and fabricate slowing webs or bile pods.
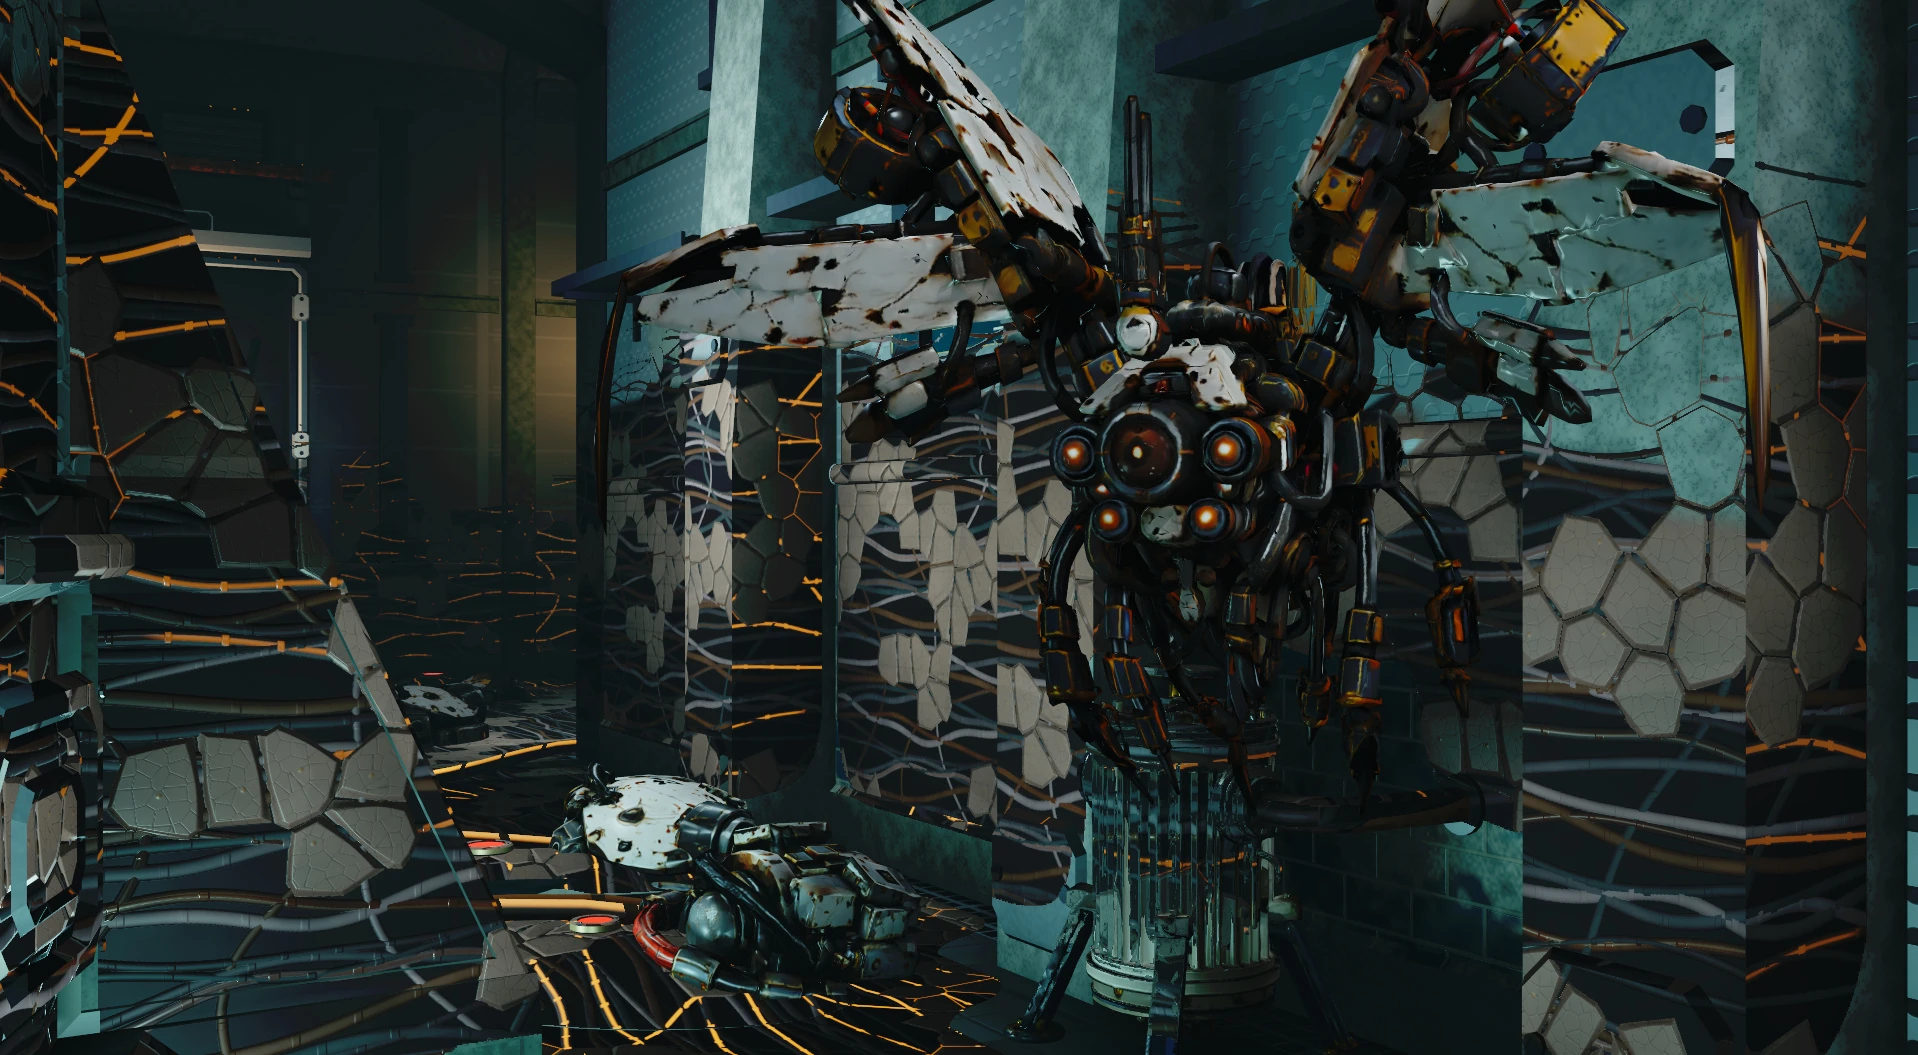
Flight chassis / 24 personal supply / tier 1
Chime
Change the height.
Change the fight.
- Role
- Use flight to harass from above and pressure exposed approaches.
- Tier 1 / Spikes
- Fire spikes while airborne, adding ranged pressure to the hive’s close-range front.
- Tier 2 / Dispersal
- Release a cloud that reduces crew bullet damage inside it. Place the cloud where allies are fighting.
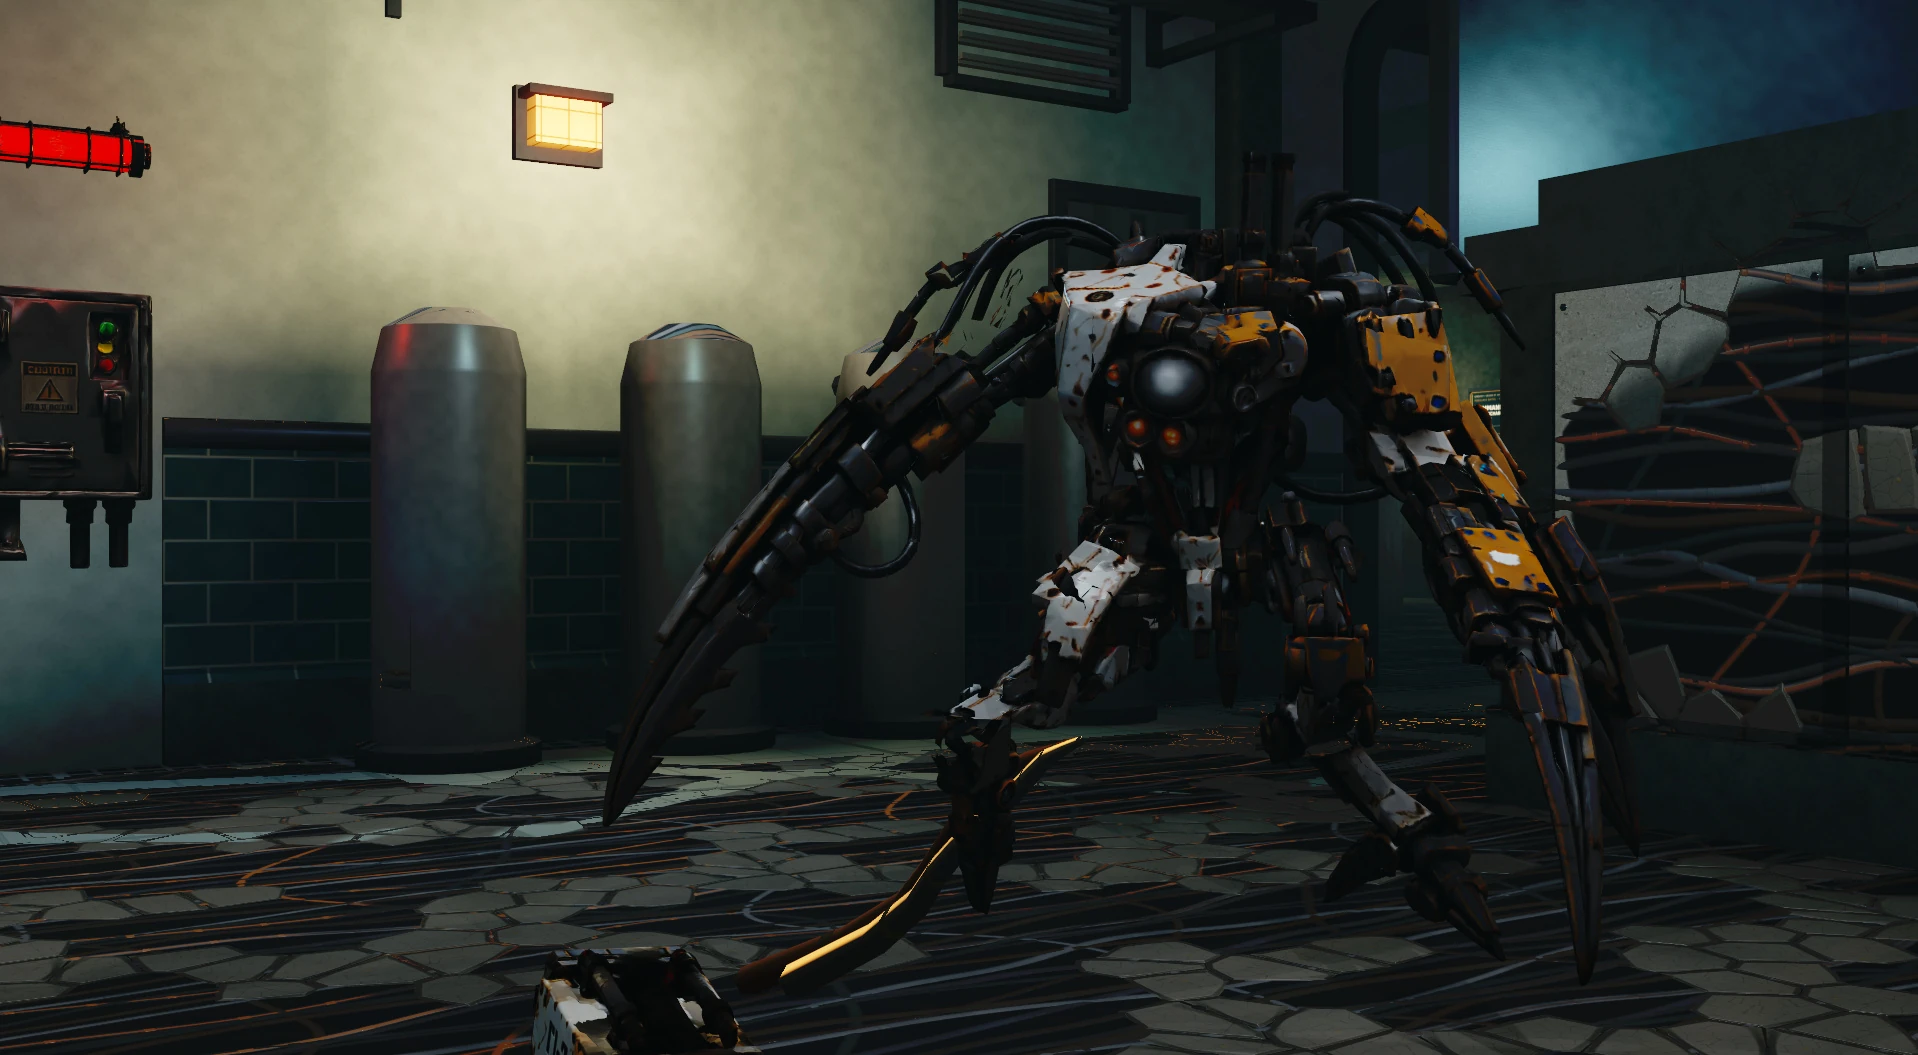
Strike chassis / 36 personal supply / tier 2
Skip
Commit to the strike.
Keep an exit.
- Role
- A fast striker with a brief wind-up before its blink burst.
- Tier 2 / Dodge
- Use a strafe input to blink sideways. A charged strike is especially effective against structures.
- Tier 3 / Metabolize
- Channel a short recovery to mend and refresh the blink, with a movement cost while channeling.
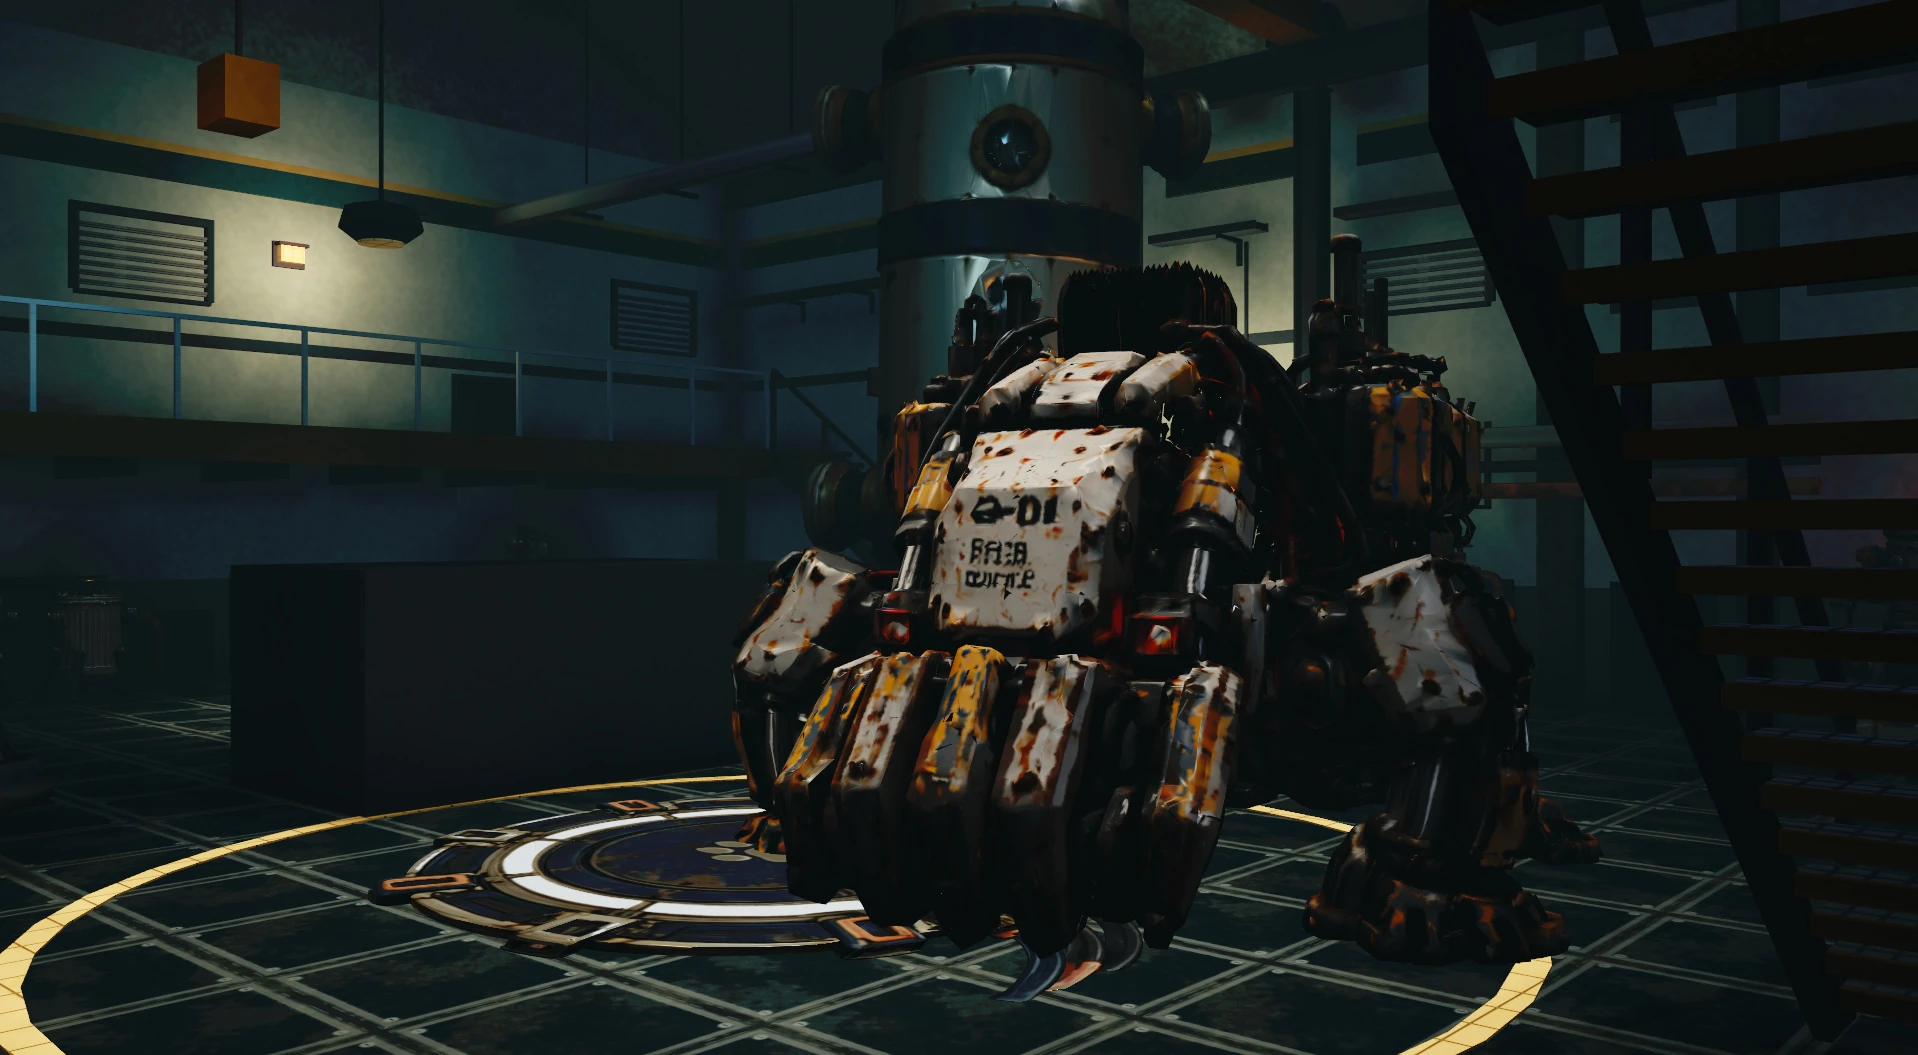
Heavy chassis / 48 personal supply / tier 3
Bastion
The corridor becomes
a problem of mass.
- Role
- The hive’s heavy front: tough, large, and restricted to routes with room for its body.
- Charge
- Wind up, then drive through the front, shoving and knocking down crew and damaging a structure in the path.
- Slam
- Strike the ground to briefly stun nearby grounded crew. Vents, tight service crawls and narrow catwalks are closed to Bastion.